¶ Creating Modded Items
Creating modded items can range to a simple to complicated process depending on your UE4 skill. For example, you can duplicate an existing blueprint and edit the details to create your own unique item. Then all you would need to do is register the item in the ModRegistry. This is easy to do, and we will cover that in this guide. If you are more experienced, you can create your own custom item blueprints from scratch. This takes more skill, but it still uses the same simple process to register the item.
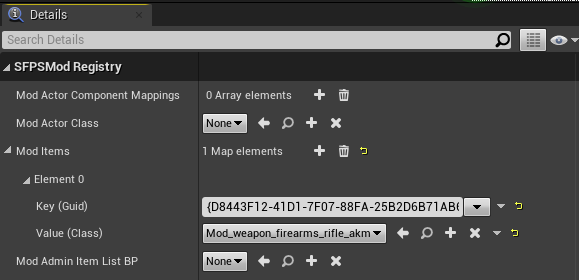
To register a modded item, open the ModRegistry and go to the details. Under Mod Items, click the plus to register a new modded item. This will generate a new GUID Key, which you then assign to your modded item by selecting the class from the Value (Class) dropdown menu. That is all you need to do in order to register the item within the game. You will still need to have ways to make your item available in the game, for example assigning it to a trader list, loot spawners, event rewards, ect.
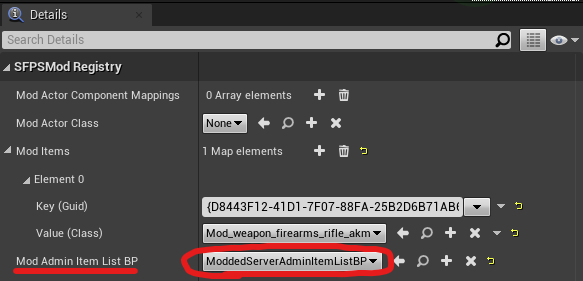
We can also add modded items to the admin list in the ModRegistry. To do this, create a duplicate of the vanilla admin list located at Content/Blueprints/ServerAdmin/ServerAdminItemListBP, and move it into your mod folder. This blueprint contains many lists of items that we also need to replace in order to add your modded item. For example, lets say we modded in a new weapon. We would want to then create a duplicate of the weapon list located at Content/Blueprints/ServerAdmin/DT_SA_Tactics, and move it into your mod folder. Open this list, and add your modded weapon into the list. Assign the new list to your modded admin list. Finally, we assign the new admin list in the ModRegistry in the Mod Admin Item List BP dropdown menu.
For more details and an example of these steps, check out our video guide