¶ Creating a Mission
Missions are very similar in function to Encounters, but typically feature more AI and complexity. Because of this missions and encounters can share the same gameplay area, route actors, and hearing volumes. So if you have already setup an encounter in your POI, you can skip a few steps in this guide.
¶ Step 1: Move the Gameplay Area blueprint to the level.
If there is already a GA in your POI, then skip this step.
Find the GA_Base blueprint at: Blueprints/Gameplay/GA_Base.uasset, and move it into level
GA must be located in the center of the territory where the mission will be created
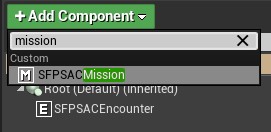
¶ Step 2: Adding a mission to GA
Select the GA, in the Details menu, click Add Component and select “SFPSACMission“
Don't forget to name the mission to stay organized!
¶ Step 3. Adding bot spawners.
To do this:
At the level, select GA, in the Details menu, select the mission.
Click Add Component and enter “SFPSACSpawner“.
¶ Step 4. Setting up the bot spawner.
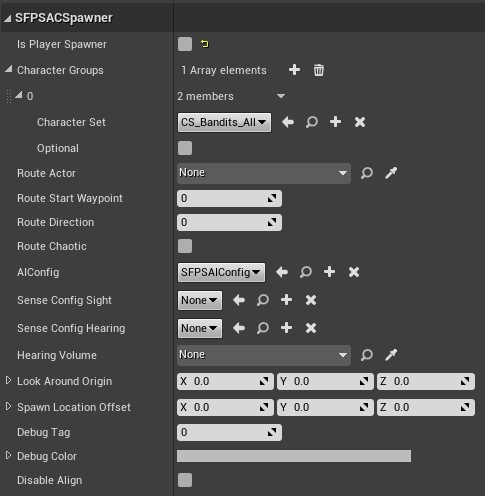
Is Player Spawner - always False for bot spawners in an encounter.
Character Groups - an array of possible bot variations.
Character Set - a table of bots for spawning (this setting is mandatory).
Optional - If false, then a bot will definitely spawn in this spawner, which is NOT counted in the total number of bots. If true, then a bot from the total number of bots can spawn in this spawner.
Route Actor - a pointer to the path the bot will follow.
Route Start Waypoint - the starting point of the path.
Route Direction - the direction of movement along the path.
Route Chaotic - the bot will choose the next point of the path randomly, rather than sequentially.
AIConfig - AI configuration (this setting is mandatory).
Sense Config Sight - configuring the bot's vision configuration (if left None, the default setting will be used).
Sense Config Hearight - configuring the bot's hearing configuration (if left None, the default setting will be used).
Hearing Volume - a pointer to the blueprint of the bot's hearing area.
Look Around Origin - a vector that can be moved in space, a purple figure, thanks to it you can adjust the angle where the bot will look during spawn (if you just rotate the spawner, the effect will be the same)
Spawn Location Offset - the bot's spawn offset.
Debug Color - the color of the spawner point. If there are many bots involved in different events in one place, it is worth changing their color for better orientation in them.
Route Direction:
0 - the bot goes in a random direction along the path.
1 - always in the direction of increasing waypoint number.
-1 - always in the direction of decreasing waypoint number.
To save time, it is recommended to set up one bot and copy it by moving it while holding L Alt, rather than setting up each one separately. Then change the settings that will be different.
¶ Step 5: Add RO paths
If you already setup RO paths for an encounter, you can use those and skip this step if you choose
RO paths, or Route Actors, are a set of waypoints placed into the level that tell AI where and how to move when the encounter is triggered
Find the RO_Base blueprint at: Blueprints/Gameplay/RO_Base.uasset, and move it to the level. Remember to name it to stay organized
To create new waypoints, copy it by moving it while holding L Alt. For the best server optimization, use as few waypoints as possible.
RO paths are assigned to AI in the spawner parameters, specifically under Route Actor
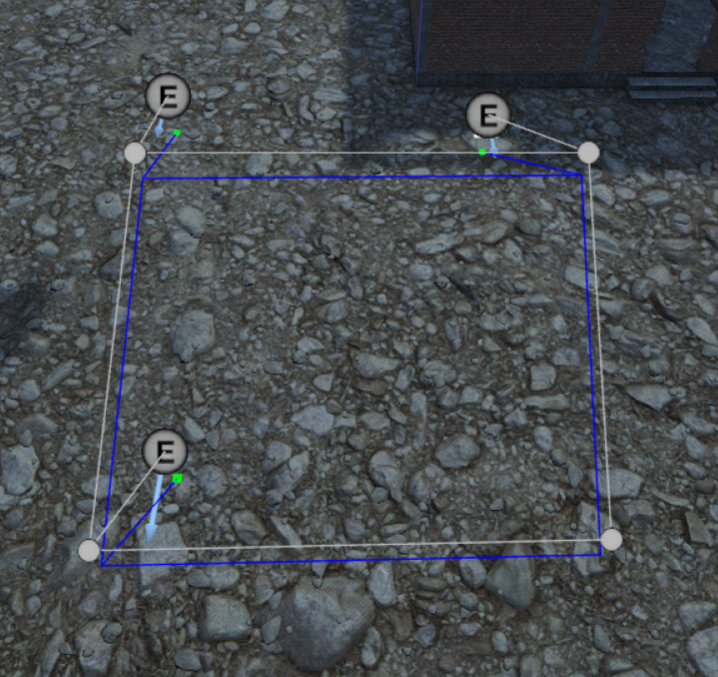
When correctly configured, the purple/blue line on the bottom will show approximately where the AI will walk.
¶ Step 6. Adding Hearing Volumes
If you have already setup hearing volumes for an encounter, you can use them and skip this step
Hearing Volume (SFPSAIHearingVolume) - a hearing area that can be assigned to a bot and it will not hear anything that happens outside this area until it sees a player.
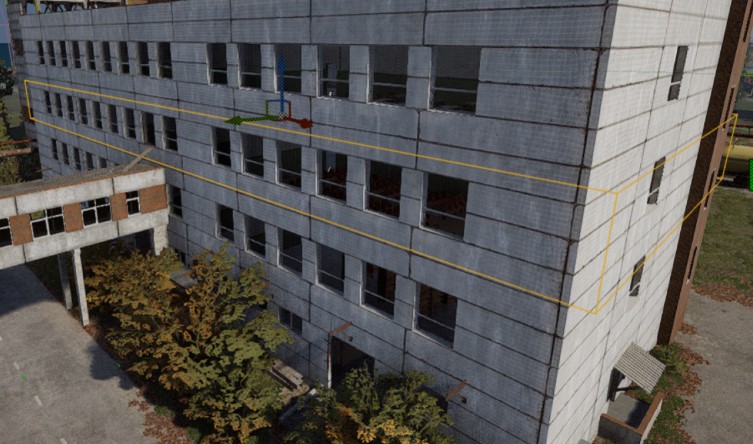
¶ How to Make Your Hearing Volume
Find the C++ class SFPSAIHearingVolume at: C++ Classes/Deadside/Server/AI/SFPSAIHearingVolume, and move it to the level.
Move it to the desired location, and adjust size with the brush tools in the details menu
Finally, assign the volume to AI in the hearing volume parameter of the spawner
¶ Step 7. Adding loot boxes.
Select GA in the level, then your mission from the Details menu.
Add a Scene component to the mission
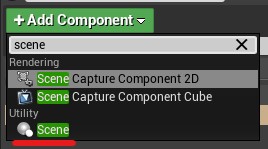
In the Details/Tags/ComponentTags menu of the new Scene, add a component tag, then type the “RewardPoint” tag.
Now move the scene in the level where you want the reward point to spawn. Placing reward points can be difficult, as the scene does not give you a preview of what the reward box will look like in game. The box spawns directly above the scene, centered on it. So place your scene directly on the ground, roughly where you want the box to spawn. Exact placement in tight spaces may require a bit of trial and error.
If you place multiple reward points, the mission will choose one randomly to spawn the reward at the end of the mission
When placing boxes, remember that they do not affect the NavMesh and bots will not run around them. So ideally, boxes should be placed in corners or near walls
¶ Step 8. Setting up mission parameters.
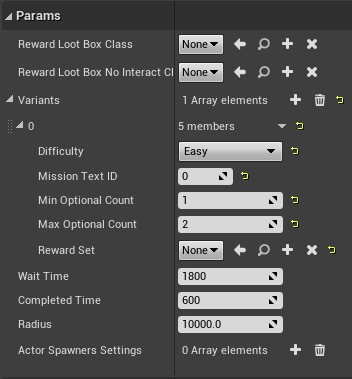
Reward Loot Box Class - For any mission, always set it to “LootBox_Mission_01“
Variants - an array of possible missions
Difficulty - mission difficulty, easy, medium, hard, or epic.
Mission Text ID - notification displayed in the text chat when the mission activates, 0 = Easy, 1 = Medium, 2 = Hard, 3 = Epic
Min Count - minimum number of bots
Max Count - maximum number of bots
Reward Set - loot table for the lootbox
Wait Time - time until the mission is activated after its completion
Completed Time - time after the mission ends until it is deleted
Radius - radius of the area that must be crossed by a player to spawn the mission AI (when mission is active)