¶ Editing Levels
The Deadside Modkit allows you to create your own maps, or to make your own versions of existing vanilla maps. There are two methods to get custom assets on the map, one is to replace the entire map to load a custom version, another is to load a custom level into an existing map. The second option is best if you plan to add to a vanilla map, this way your mod is lightweight and more compatible. If you would like to use the section option, create a new level inside of the existing one, then move all of your modded assets into your mod folder when finished.
¶ Step 1: Build your Level
The first part of level design is very fun, create your level geometry using the landscape mode (found under modes, or shift+2), and with props. These can be found in Content/Geometry/Meshes. Foliage can be placed with the foliage mode (found under modes, or shift+3). Once you have a level you are happy with, we can begin to configure it with events, and get it ready to upload
¶ Step 2: Nav Mesh Bounds
A critical function of Deadside maps are its Nav Mesh. This is a low poly mesh generated by the level geometry, which AI use to pathfind. To generate a Nav Mesh, we need to first define the area that the engine will build the mesh. This can be done with a simple volume called Nav Mesh Bounds Volume, found in the place actors tab
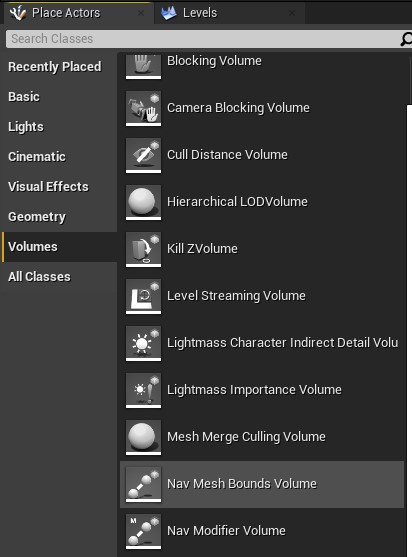
Once placed into the level, make it larger so that in encompasses the entire area which you would like the nav mesh to be generated. Hitting R on the keyboard brings up the scaling tools, or you can use the brush tools in the details tab
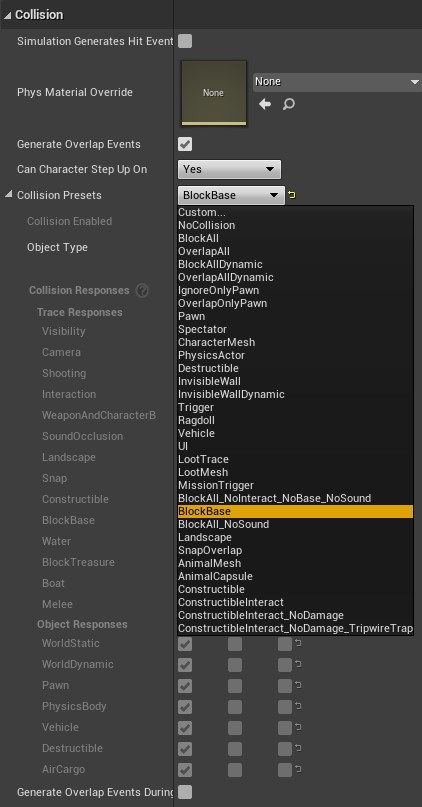
¶ Step 3: Blocking Volumes
Blocking volumes can be used for many purposed in your map, but two of the most important are to function as invisible walls, and as base blockers. You can find them in the place actors window
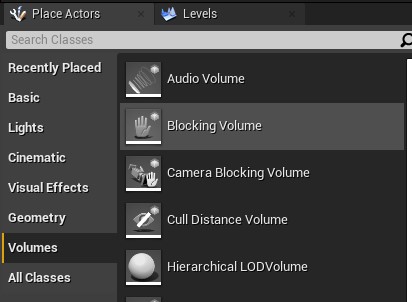
Once placed and sized in the level, you can configure the collision in the details tab. By setting it to base blocker, players will not be able to build bases while inside of this volume
¶ Step 4: Setup Gameplay Events
When setting up gameplay events, you need to create a separate gameplay level. Once created, you need to make that your current level to edit and place actors inside.
For guides on how to setup gameplay events, see these pages:
- Encounter Setup
- Mission Setup
- Patrol and Convoy Setup
- Helicrash, Airdrop, and Roaming Trader Setup
- Airdrop Modding
¶ Step 5: Loot Spawners
Next we need to setup our loot spawners
We need create our own separate loot level. Once created, you need to make that your current level to edit and place actors inside. The easiest way to do this is the box on the bottom right of the viewport, click on it and select the loot level. This can also be done in the level window if you have it open.
Next, we can find all the loot spawners in Blueprints > Loot Spawners. From here we can select which spawner we would like, and drag it into the level. You can configure and edit loot spawners by using nodes in the mod registry. A video guide for that can be found here.
¶ Step 6: Player Spawners
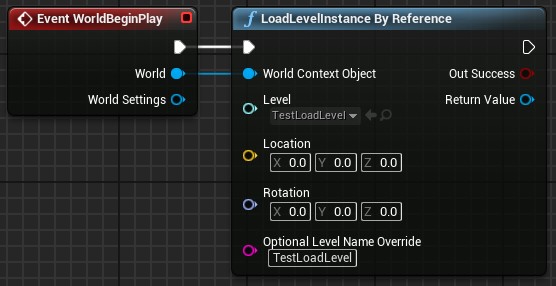
To place player spawners, we go to the Blueprints > Gameplay folder, and find SP_Base. These are player spawn points that we can drag into the level. Usually not much configuration is needed, but if the spawner is red instead of white there is an error causing it to be non-functional. Player spawners are typically placed in the persistent level, but can be loaded in another level using the LoadLevelIstance by Reference node shown below in the next step.
¶ Loading Modded Levels
If you are loading a modded level into an existing map, getting it to load is easy. Place an Event WorldBeginPlay node, and connect it to a LoadLevelInstance By Reference node. Connect the world node on Event WorldBeginPlay to the World Context Object in your loadlevel node. Then write the name of your level in the level name override field. If you are loading a server only or client only level, like a loot level, you can leave the name blank
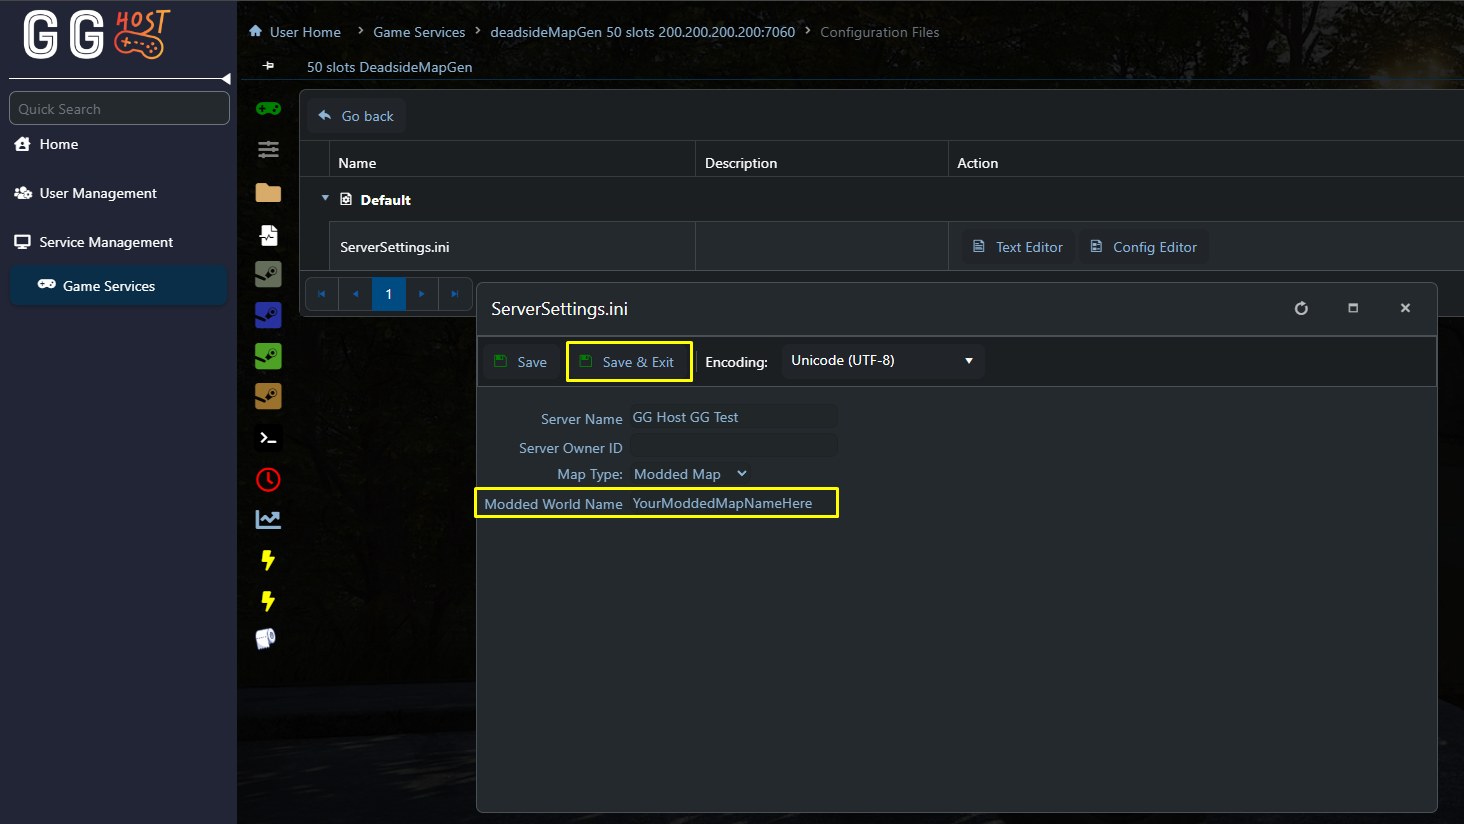
¶ Uploading Modded Maps (GGHost)
This guide covers uploading modded maps to GGHost servers. You may need to contact your host if you would like to upload modded servers to other providers.
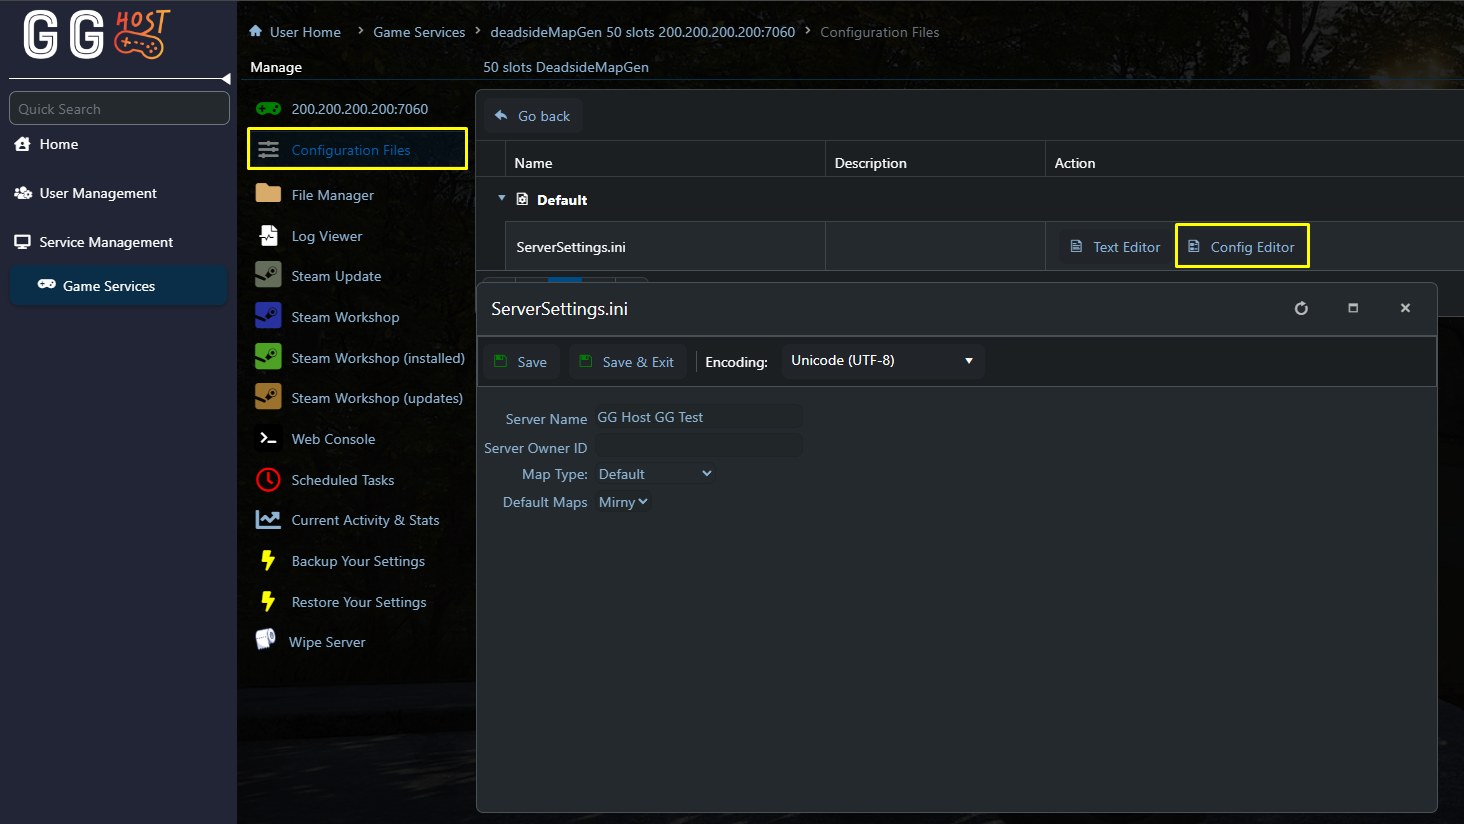
First login to your GGHost game panel, then open the Deadside service that you would like to edit. Stop the server before making any changes, map changes only apply after a full restart.
Go to the Configuration Files, and open the Config Editor:
Under Map Type field select the Modded Map option.
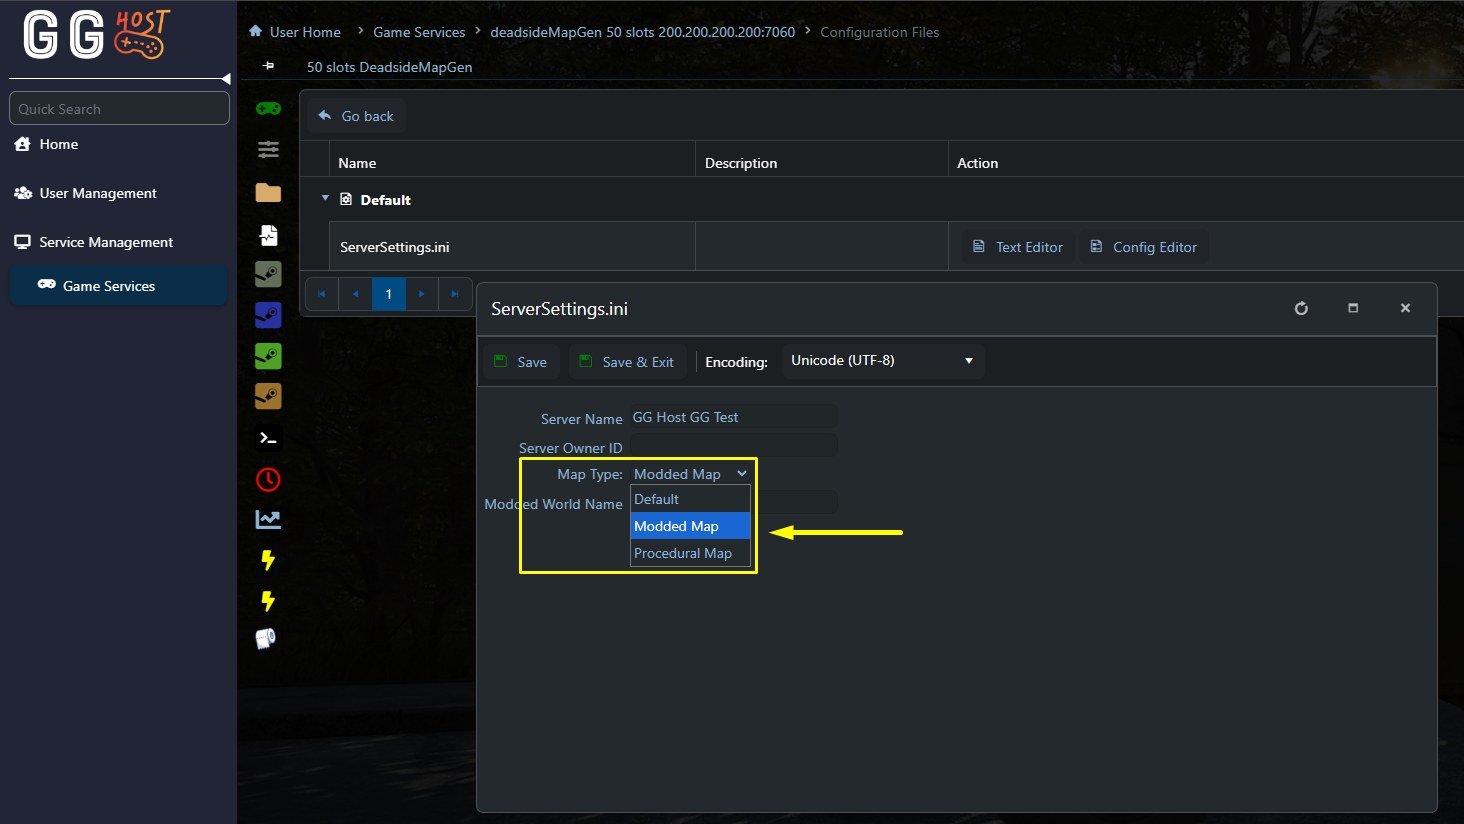
This will create a new field titled Modded World Name. Here you write the name of the modded map you would like to run. Important: the name must exactly match the map name defined by the mod author to run. If the name is incorrect, the server may fail to start or default back to World_0. If you don't know the exact world name, you may need to contact the mod author for that information.