¶ Deadside Modkit
This section of the wiki covers everything related to the Deadside Modkit, starting here with basic usage and mod setup. For more detailed modding guides, visit these pages;
Video tutorials available here
¶ Installing the Modkit
The Deadside Modkit is installed through the Epic Games Launcher that you can download here. Once installed, search for the Deadside modkit in the store tab and install. The Deadside modkit requires ~81GB of free space, however 100GB and an SSD is recommended for best performance.
¶ Mod Creation Basics
To create a mod, press the “Create Mod” button at the top of the editor, and then select a template

Empty Mod - Creates an Empty Mod with a ModRegistry Blueprint
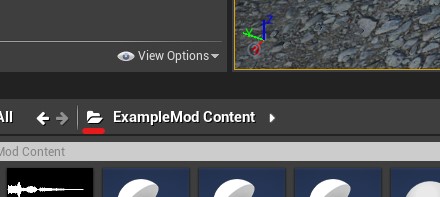
Example Mod - Creates an example Mod that you can experiment with
Example Map - Create an example Map that you can experiment with
Important Rules:
- When naming your mod, give it a unique name. Mods with the same name but different IDs can cause problems
- Do not cross-reference assets between different mods, it can lead to server/client crashes
- Do not use non-Latin characters (like Cyrillic) in asset names, most likely they won't be loaded by server
- Do not use the following development pipeline:
- Create a mod
- Edit
- Publish as "Mod#1"
- Edit again
- Publish as "Mod#2"
- Use the following pipeline:
- Create "Mod#1"
- Edit
- Publish as "Mod#1"
- Create "Mod#2"
- Edit
- Publish as "Mod#2"
All of your mods and the modkit content can be found by hitting the file button in the content browser. When a new mod is created, a new folder is made for that mod
¶ Enabling PIE
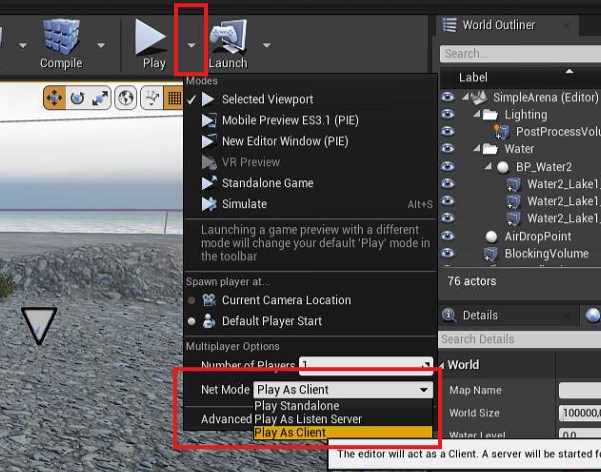
PIE, or play in editor, allows you to test your mod in a local version of the game within the viewport. This can be very useful for testing, however we recommend that you do your final testing on a live server. To enable PIE, hit the dropdown menu, and in Net Mode select “Play As Client." You can also change the number of players, with each player getting a new viewport window for you to control them with
¶ Uploading Your Mod
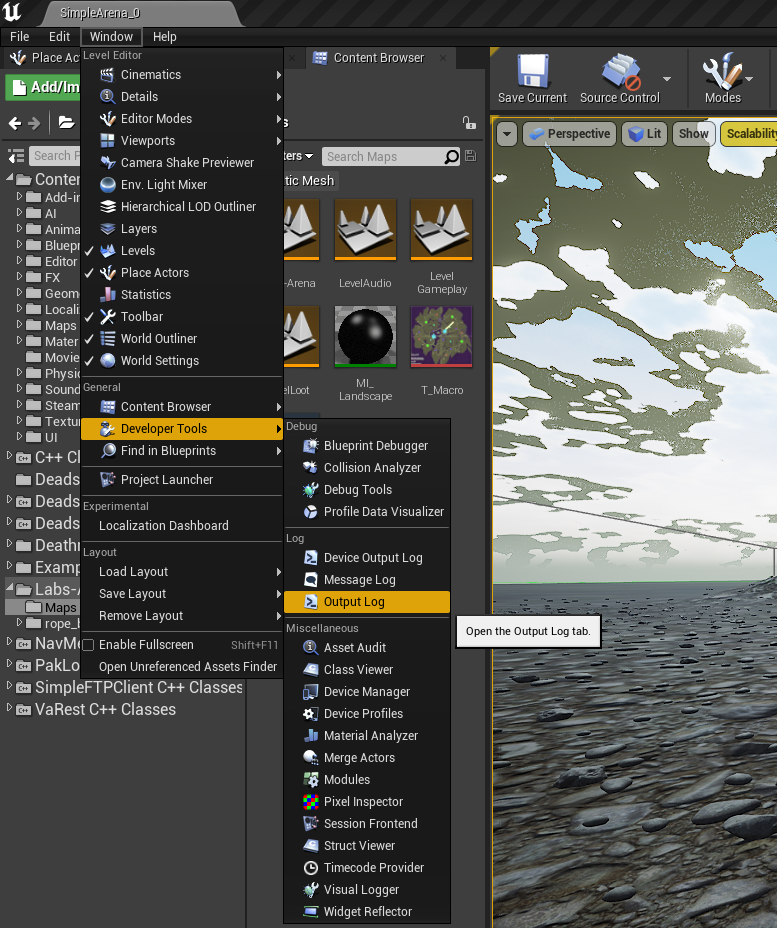
When you are finished developing your mod, we can begin the upload process. First your mod needs to be built using the build mod button. When building, always check the Output Log for details in case issues are detected. The Output Log can be found under Window > Developer Tools > Output Log. If no issues are found, we can continue and upload your mod to the Steam Workshop with the Share Mod button at the top. Fill out the details, and upload! Now all that is left is to install your mod on the server. When players go to connect to your server, they will automatically subscribe to your mod on the workshop, downloading it to their client. Updates to your mod will also automatically install when players connect, but you will need to manually update the server.
When uploading your mod, do not rename it. Doing this can potentially break the mod
¶ Uploading Your Mod - GGHost Servers
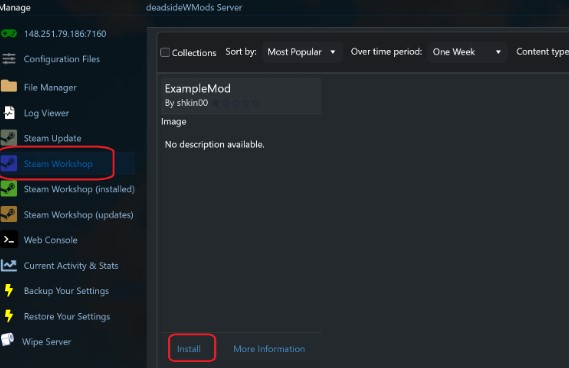
To install your mod on GGHost servers, first stop the server. This needs to be done before installing, updating, or deleting any mods.
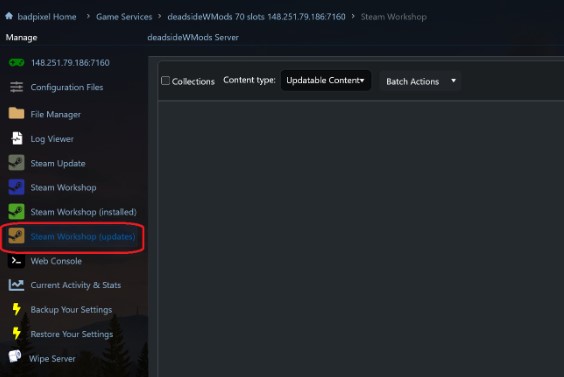
To see available mods on Steam, go to the Steam Workshop tab, search for your mod, and click install.
To check if a mod needs to be updated, under content type you can select Updateable Content. Any mods with updates available will appear, you can then install the update.
To change to a new map, go to Configuration Files > Config Editor > open ServerSettings.ini. Find the World/Map option

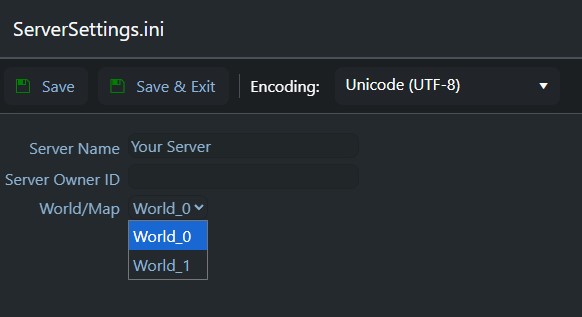
Here you can change the name of the map that you would like the server to use, for example the built in maps are World_0 (Mirny) and World_1 (Potny). Now select your modded map from the dropdown list
Currently GGHost is still working on implementing a system to allow for an easy switch to a modded map. For now, players will need to open a support ticket so that GGHost support can manually add the modded map
Output Log
The Output Log (found under Developer Tools / → Output Log or via Window → Developer Tools → Output Log) Is mainly used for debugging and monitoring what the engine is doing internally. The Output Log shows all runtime messages, warnings, errors, and debug prints from the engine and your project, making it one of the main debugging tools in Unreal.